 Flow - 4x faster than typing

 Mini tools
Chat2Workflow
Chat2Workflow: A Benchmark for Generating Executable Visual Workflows with Natural Language
README
Chat2Workflow






Table of Contents
- 🔔 News
- 👀 Overview
- 📁 Directory
- 🔧 Installation
- 🧐 Evaluation
- 💻 Generation
- ⚙️ Conversion
- 📜 Citation
🔔 News
- [2026-04] We release a new paper: "Chat2Workflow: A Benchmark for Generating Executable Visual Workflows with Natural Language".
👀Overview
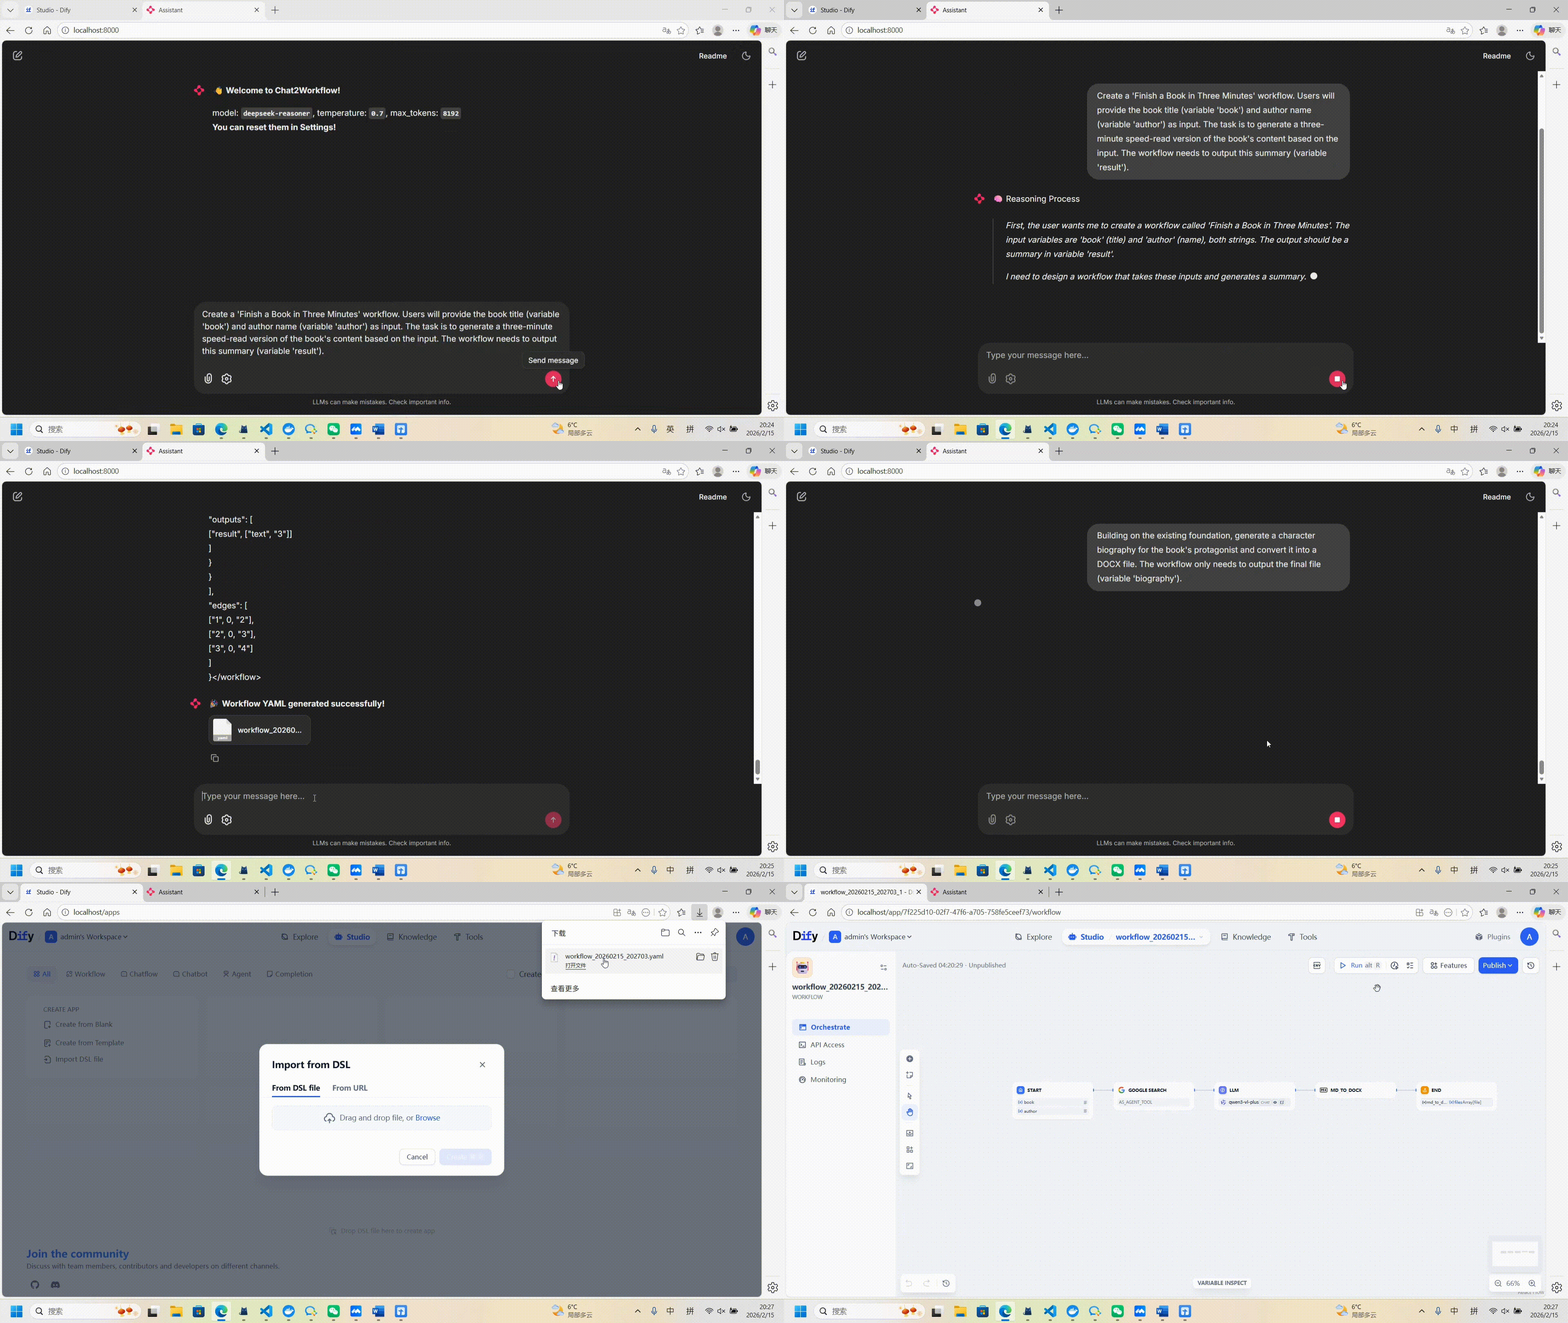
Demostration
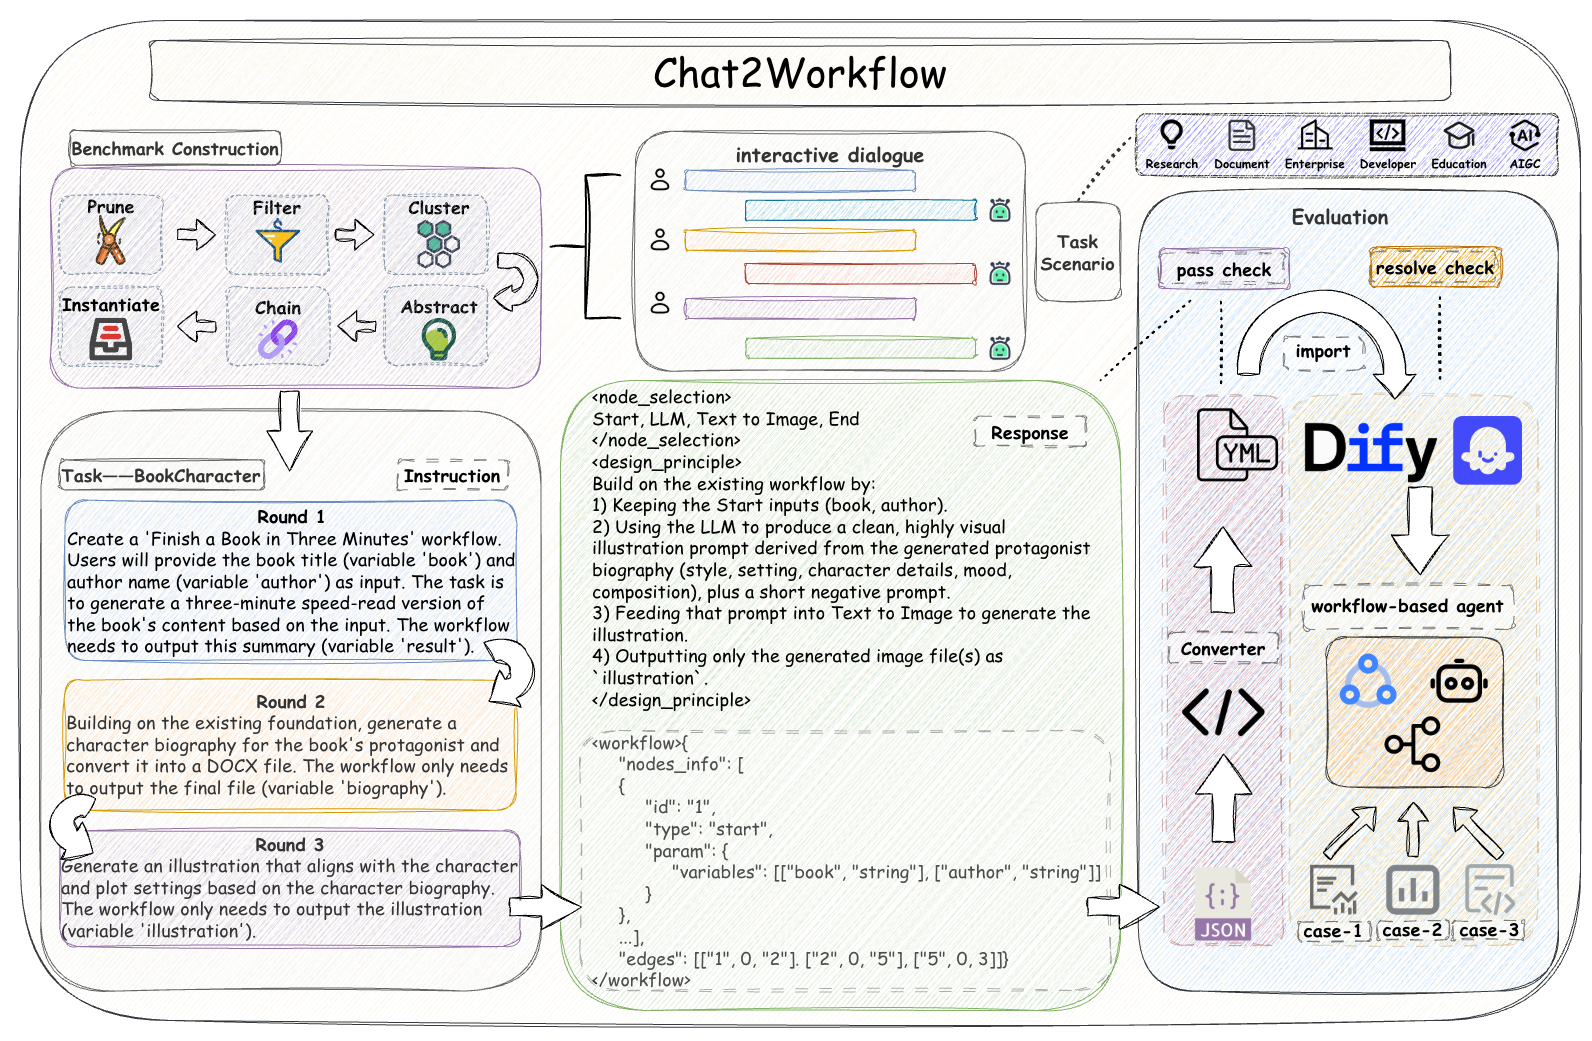
Benchmark
📁Directory
| Directory | Description |
|---|---|
.agents/skills/chat2workflow/ |
The skills used for agentic workflow generation in our benchmark |
assets/ |
The images used in README.md |
case_files/ |
All files required for the test cases |
dataset/ |
Workflow generation instructions and evaluation checks |
experiment_run_example/ |
An example of the results from a single experiment run |
nodes/ |
The functional logic of each node |
prompts/ |
System prompt and evaluation prompts |
skill_chat2workflow_interactive/ |
The skills used for interactive workflow generation |
yaml/ |
The generated Dify workflow YAML files, you can obtain them from |
| https://huggingface.co/datasets/zjunlp/Chat2Workflow-Evaluation |
🔧Installation
Conda Environment Configuration
Conda virtual environments offer a light and flexible setup. For different projects, we recommend using separate conda environments for management.
conda create -n chat2workflow python=3.10
conda activate chat2workflow
pip install -r requirements.txt
Deploy Dify with Docker Compose
Before installing Dify, make sure your machine meets the following minimum system requirements:
- CPU >= 2 Core
- RAM >= 4 GiB
Obtain the specified version of dify:
git clone https://github.com/langgenius/dify.git --branch 1.9.2 --depth 1The easiest way to start the Dify server is through Docker Compose. Before running Dify with the following commands, make sure that Docker and Docker Compose are installed on your machine:
cd dify
cd docker
cp .env.example .env

# [Optional]: The default port is 80. You can modify it (MY_PORT) here.
# If modified, it needs to be synchronized to `config.yaml`.
perl -pi -e 's/^EXPOSE_NGINX_PORT=.*/EXPOSE_NGINX_PORT={MY_PORT}/' .env

docker compose up -d
After running, you can access the Dify dashboard in your browser at http://localhost:{MY_PORT}/install and start the initialization process.
Dify Initialization
-
Setting up an admin account. Also fill the following information into
config.yaml.- email_address
- user_name
- password
-
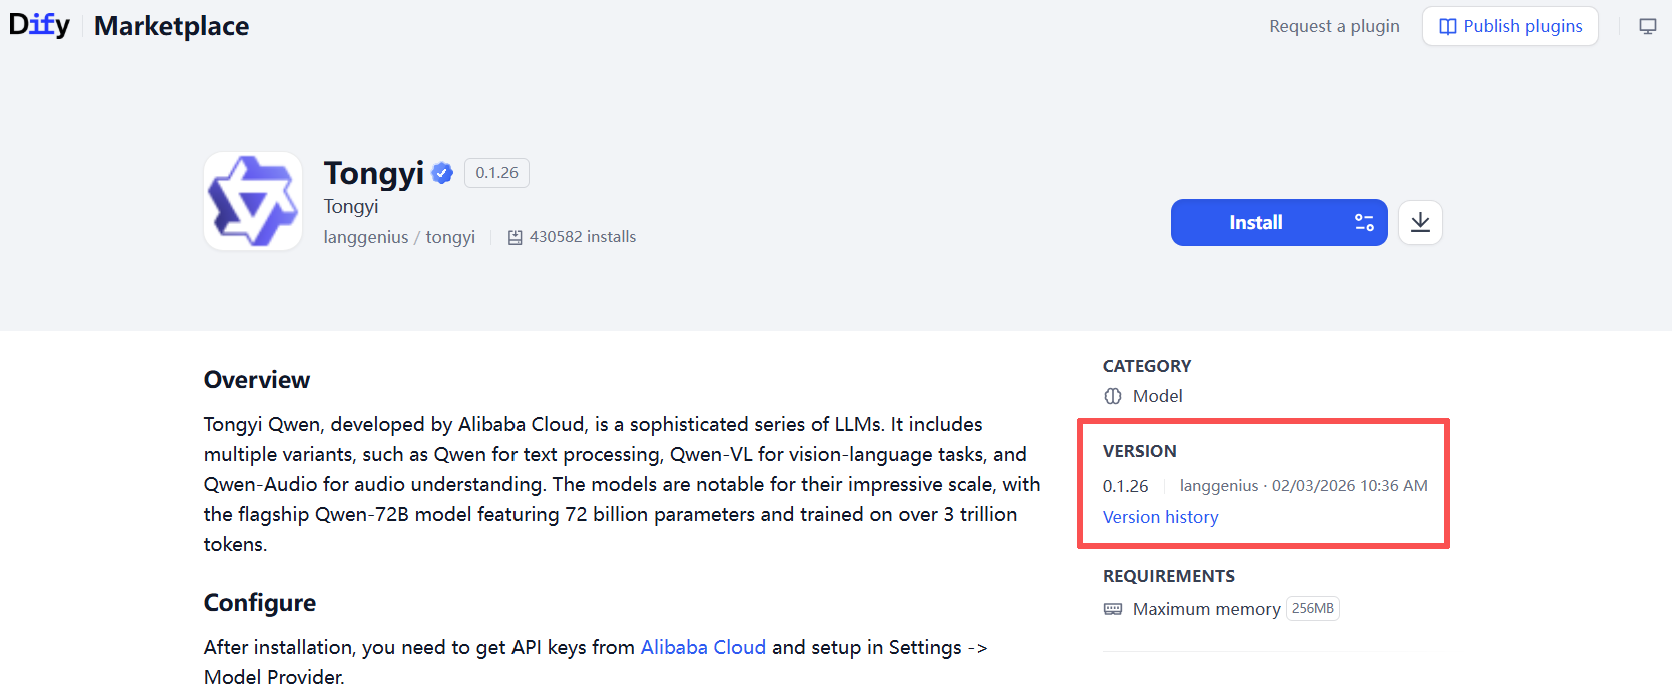
Install the following specified version plugins in [Plugins]-[MarketPlace]:
- langgenius/tongyi:0.1.13 —— API Key Configuration in [Settings]-[WORKSPACE]-[Model Provider]
- langgenius/openai:0.2.7 —— API Key Configuration in [Settings]-[WORKSPACE]-[Model Provider]
- sawyer-shi/tongyi_aigc:0.0.1 —— API Key Configuration in [Plugins]
- langgenius/google:0.0.9 —— API Key Configuration in [Plugins]
- bowenliang123/md_exporter:2.2.0
- hjlarry/mermaid_converter:0.0.1
- langgenius/echarts:0.0.1
In this setup, the LLM defaults to
tongyi:qwen3-vl-plus, TTS (Text-to-Speech) toopenai:gpt-4o-mini-tts, image generation totongyi_aigc:z-image-turbo, search engines togoogle:SerpApi, Question Classifier and Parameter Extractor totongyi:qwen3-max. After the workflow is generated, you can modify the above nodes as needed.
Opencode Initialization (Optional)
The OpenCode framework is only required for the agentic generation mode.
Obtain the specified version of opencode:
curl -fsSL https://opencode.ai/install | VERSION=1.3.17 bashPlease ensure that the APIs for the necessary models are configured in advance.
🧐Evaluation
1. Fill in the information in the config.yaml.
# Github REST API for higher rate limits.
# Used for the GithubSummary task in the resolve stage.
github_rest_token: "github_xxx" # null or "github_xxx"

# Your admin account
user_name: "xxx"
email_address: "[email protected]"
password: "xxxxx"

# LLM API for workflow generation and evaluation
llm_api_key: "sk-xxxxxx"
base_url: "xxxxx"
evaluation_model: deepseek-chat

# (Optional) —— Required for agentic generation
# OpenCode binary path, supports ~ in path. You can get this path by running `which opencode` in your terminal.
opencode_bin: "~/.opencode/bin/opencode"
2. Generate LLM response.
-
Zero-Shot Mode: Modify the
model_nameand then execute the script.# The result will be stored in `output/llm_response`. bash bash_generation.sh -
Agentic Mode: Modify the
modeland then execute the script.
Note:
- Model Format: The
modelparameter must follow theprovider/nameformat (e.g.,deepseek/deepseek-chat).- Available Models: You can view the list of supported models by running the
opencode modelscommand.- Prerequisite: Ensure that the corresponding API key for your selected model is configured in OpenCode prior to execution.
# The result will be stored in `output/llm_response`.
bash bash_opencode_generation.sh
3. Evaluate the LLM response.
# Step 1: The pass stage of the evaluation.
# The result will be stored in `output/pass_eval` and `output/yaml`.
bash bash_pass_stage.sh

# Step 2: The resolve stage of the evaluation.
# The result will be stored in `output/resolve_eval`.
bash bash_resolve_stage.sh
4. Obtain the evaluation results.
python statistics.py💻Generation
We provide two interactive approaches for generating workflows.
Launching the Interactive Demo (Zero-Shot Mode + Autofix)
-
Fill in the information in the
config.yaml.# LLM API for workflow generation and evaluation llm_api_key: "sk-xxxxxx" base_url: "xxxxx" -
Run the Python script to start the workflow generation program.
chainlit run chat2workflow.pyClick on the returned link to start the interactive conversation. The result will be stored in
output/generated_workflows.
Finally import the generated YAML file into the Dify or Coze platform for execution.
Generating via OpenCode CLI (Agentic Mode + Autofix)
Note:
- The default SKILL (
.agents/skills/chat2workflow) is optimized for automated benchmark evaluation.- For real-world interactive applications, please use
skill_chat2workflow_interactive. To enable it, replace the default folder in.agents/skills/with this interactive version, ensuring the directory remains named chat2workflow. We have published this SKILL on Clawhub.
-
Fill in the information in the
config.yaml.# OpenCode binary path, supports ~ in path. You can get this path by running `which opencode` in your terminal. opencode_bin: "~/.opencode/bin/opencode" -
Launch the OpenCode interactive CLI.
opencodeOnce the model generates the target response, it can be prompted to automatically perform self-correction and synthesize the corresponding configuration file.
Optionally, users can manually execute bash_converter.sh to convert the generated responses into the target configuration file.
⚙️Conversion
bash_converter.sh
python converter.py \
    --json_path test.json \ # The JSON file path
    --name test \ # The name of the workflow
    --output_path output/converter \ # The output path
    --type dify # dify or coze
In most cases, the JSON format can be seamlessly converted for both Dify and Coze. In rare instances where the conversion fails, platform-specific system prompts should be used for generation (refer to prompts/builder_prompt.txt and prompts/builder_prompt_coze.txt).
📜Citation
If you find our work helpful, please consider giving a star ⭐ and citation 📝
@misc{zhong2026chat2workflowbenchmarkgeneratingexecutable,
      title={Chat2Workflow: A Benchmark for Generating Executable Visual Workflows with Natural Language},
      author={Yi Zhong and Buqiang Xu and Yijun Wang and Zifei Shan and Shuofei Qiao and Guozhou Zheng and Ningyu Zhang},
      year={2026},
      eprint={2604.19667},
      archivePrefix={arXiv},
      primaryClass={cs.CL},
      url={https://arxiv.org/abs/2604.19667},
}